Beachy Keen - Part 2, Three Beach Memory Crafts
Thought I would share with you the guest post I did a couple of weeks ago. I know Summer is officially over, but I think its still a great project if you have any beach souvenirs from vacation.
Enjoy!
Hello, One Artsy Mama Fans! I am so excited to join you today. A huge thank you to Amy for inviting me to be a part of her New Kids on the Block series. My name is Joey Bailey and I started my craft blog this summer. My vision is simple, to try whatever crafts I am inspired to try and share my journey with you. It has been so much fun, both the successes and the failures. I am learning a lot, and I hope you will join me at Created in AWE to see what happens next. Your feedback is very important. So be sure to let me know what you think! This post is the second of two related to creating vacation memory crafts from the beach. We finished it on Labor Day weekend as a bit of a goodbye to summer. Enjoy!
Even after creating the Beach Memory Vase in Part 1 of Beachy Keen, we had enough shells from vacation to do a few more projects. These three crafts made use of the sand and remaining shells we couldn't bare to throw away. Even the tiny broken pieces, as you will see.
Supplies:
Shell frames: Dollar store 4x6 picture frames, various shells, hot glue or E6000, printout of picture title, mod podge, scrap piece of cardboard
Shell Jars: Craft store jars, various shells and sand, hot glue or E6000
Shell Pendant: Sand Dollar or shell, 24 gauge wire, pearl, silver bead
 After an excursion to Shell Island, we had quite a collection of shells. The kids each had mesh laundry bags for collecting the shells. I also made use again of the sand we collected on our last day. If you remember, I saved 5 of our water bottles and had each of us fill a bottle with the beautiful white sand from the beach where we took a few final photos. We packed the shells as carefully as possible placing the most precious sand dollars in paper towels. Not all of them made the trip home in one piece, but we still had plenty.
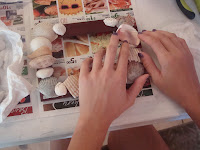
I decided this would be a project the kids would be able to do themselves. I was cautious to handle the glue for the younger ones, but they each chose and placed the shells themselves. I purchased 4x6 picture frames from the dollar store with a smooth flat surface. The kids selected their favorite shells along with several smaller shells as "fillers" and laid them along the frames to see how they would fit. The shells were then removed and glued on one at a time. Two of the kids chose to leave an empty space to fit the picture title. One decided to have the picture title glued on top of the shells. Each of them were very proud of their creations.
While the glue was drying, the kids cut out the titles I had printed onto cardstock. We used Mod Podge to glue them to a piece of cardboard (recycled cereal boxes work great) to give them structure. Then Mod Podge was applied to the front and back surfaces. After they were dry, we glued them in the preferred place on the frames.
The leftover shells were placed in craft store jars. Some were glued to the top of two of the jars, another choice the kids made themselves. As you can see, one child was quite the over-achiever in shell collecting and needed a larger jar. In fact, we need to buy another jar to hold the shells that didn't fit here! We didn't put a title on the jars, but instead display the jar and frame together.
I held back my favorite sand dollar for a simple pendant. I attached a craft pearl and a silver filigree bead (from my stash) to a large jump ring with 24 gauge wire along with the perfect little sand dollar I had preserved in a Mod Podge and water mixture as in the Beach Memory Vase project. I love this little memory that I can wear year-round!
This was a fun project for this last weekend of summer. Now we can keep our summer memories where we can see them all the time!


Comments
Post a Comment